
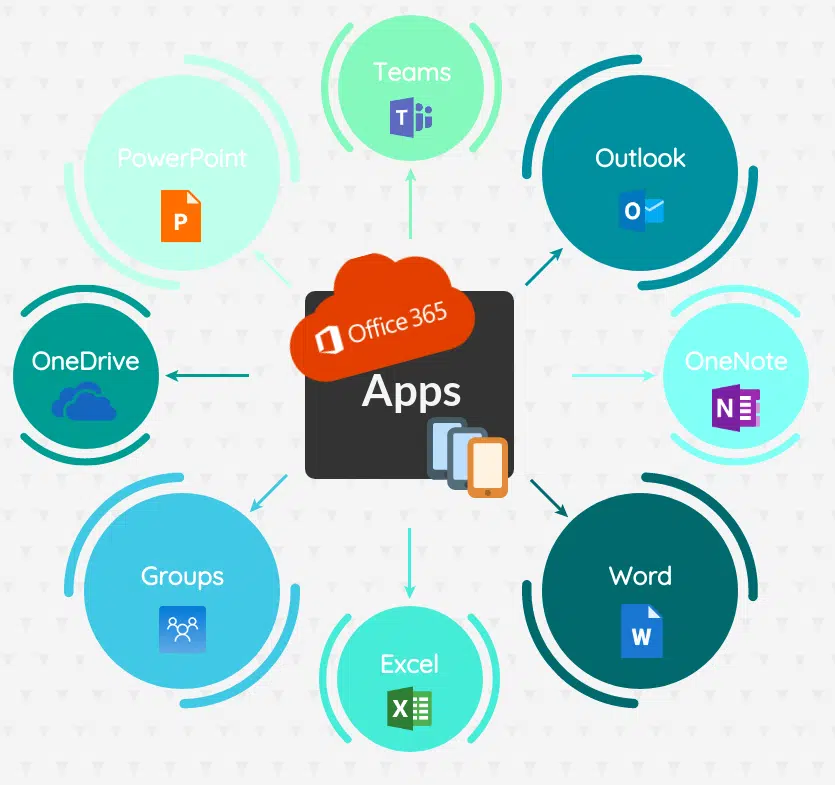
Office 365 integrates your Microsoft apps and services so that your business can grow in a collaborative, seamless way — no matter where your employees are based. The apps and services included in your business’s subscription of Office 365 depend on the plan you choose, but can you rest easy knowing that you’ll get automatic monthly updates so you never miss the best features and security settings of Office 365.
With flexible working hours and out-of-the-office locations becoming the norm in 2019, Microsoft Office 365 is the solution many businesses are calling upon to ensure managers and employees are always reachable and able to contribute to group tasks and chats.
These 32 Microsoft Office 365 tips and tricks will get your employees on board — excited, even — about the benefits of Office 365 and push them to use each program to its full potential. Focusing beyond PowerPoint and Word, these Office 365 tips and tricks will give you insights on how you can manage your business better using the entire Office 365 suite. Outlook tips, Teams tips, SharePoint tips, and OneDrive tips are just some of the topics we’re about to delve into.

Office 365 Business Tips
1. Use productivity tools on any device
With Office 365, your team can stay focused and productive no matter where they are or what device they’re working from. Encourage employees to use Office 365 apps on their mobiles and tablets — that way, they’ll be able to edit documents, check out visuals, and watch presentations on the go. Teams within your organisation will be able to stay connected no matter who is in the office, on-site, or working from home. Another one of our Office 365 tips and tricks is that, if your company has Business Premium, you and your team have access to all of the apps available, so it might just be the best investment for your business’s productivity.
2. Stay in sync
Our Office 365 tips and tricks offer the answer to staying in sync — no matter what different time zones employees are in. Having various versions of documents saved to different places can lead to major business inefficiencies. Whether it’s a group document or an individual project, multiple file versions can cause unnecessary confusion and stress. More than one version of a ‘final copy’ may even appear — this means more last-minute work for your team as they scramble to make sure one version has all the correct edits before they submit or present the project.
Using Office 365 and SharePoint means that everyone will be working on the same document, with updates always being flagged and saved, so that the final version is the same across the board and no edits are missed. This also cuts out the middle man (in this case, email), where you go back and forwards emailing the document and risk a copy getting lost along the way or coworkers accidentally downloading an outdated file attachment.
3. SharePoint’s Alert Me function
Ever spent way too much time manually checking a file for updates? Or have you been reading from a file mid-meeting only to realise it had been updated since you last went over it? These are avoidable productivity and accountability workplace hurdles. If you activate SharePoint’s Alert Me function, you’ll be automatically emailed or texted when changes are made to a file or library. This is one of our favourite Office 365 tips and tricks to increase the accessibility of changes to files across all staff member’s devices.
To set up an alert for an entire library or list, select Library or List, Alert Me, and then Set Alert on This Library. To set an alert for a single document, go to Files or Documents, Alert Me, and Set Alert on This Document. Lastly, you can even set alerts for list items. Following the same system, select the item you’d like an alert for. Then click the Items tab, Alert Me, and then Set Alarm on This Item.
User-management tips
4. Disable old accounts
Office 365 encourages your team to be collaborative and functional. However, it’s important to not get lazy when it comes to account management and risk jeopardising information and document security. Who wants an unnecessarily cluttered system, anyway!?
Even small-to-medium-sized businesses need to ensure streamlined user-account management. Remember to always disable the accounts of past employees, even if they left on great terms. This ensures company documents can only be accessed by those currently working there and who hold the correct permissions. Also remove all dormant accounts, such an old accounts of current staff members. They’re just taking up unnecessary space and cluttering the network.
5. Keep track of your licenses
It sounds simple, but keeping track of your licenses is a necessary part of our Office 365 tips and tricks list as it’s often neglected. If an employee leaves, transfer their Office 365 license to the person taking their position (or to anyone yet to be issued a license). Assigning this current license to a new person will save money in new license costs. If you make a mistake and need to reactivate an account, it can be restored for 30 days after being removed.
6. Don’t overdo permissions
Even though you hire people that seem trustworthy, it’s important for company security to not give each employee more access than you need to. When you’re assigning permissions, keep in mind that an employee should be given the least amount of permissions needed to get the job done. Microsoft recommends that assigning two to four global administrators (unlimited access) is sufficient to avoid account lock out. Not over-assigning these permissions will keep company information, licensing, and files secure.
Office 365 Excel Tips
7. Learn the keyboard shortcuts
It’s often second nature for your employees to use shortcuts when working in Word or PowerPoint. They may not realise, however, just how many useful shortcuts Excel has to offer. This is why it’s on our list of Office 365 tips and tricks. Excel keyboard shortcuts save time (less staring at spreadsheets!) and make using and navigating Excel that much simpler. This is a Godsend for those of us who find spreadsheets a bit intimidating. Shortcuts can be really useful for employees have limited mobility or vision impairments, as they won’t have to constantly navigate a mouse or touchscreen. There is a list on Microsoft of all the Excel shortcuts, which is a handy link to direct your employees to.
8. Visualise your data
Different people prefer reading data in different formats. For some, big data may be hard to navigate, and graphs really help to break this up. While not everything can be put in a graph, you may want to use a Data Bar to visually set out data in Excel. Easily add a data bar to an existing table by selecting the data and cells you’d like to generate a bar for. Then navigate to Home, Conditional Formatting, and Data Bars. You’ll then be asked to choose between a gradient fill or colour fill. This is an easy, simple way to make your Excel documents visually appealing. It also draws attention to important information.
9. Freeze panes for less pain!
One of the most frustrating things when using Excel can be scrolling through a long list of information and then reading inputs from the wrong column. That’s where freeze panes, also known as sticky rows, comes in. This simply lets you keep rows at the top of the Excel sheet as you scroll through it. This means you don’t lose what row you’re meant to be looking in or forget information — it’s all stayed right in front of you! To do this, select the letter next to or above the row to the left of the row you’d like to freeze and select View, Freeze Panes. You can also select to freeze the top row or freeze the first column. This is a handy part of our Office 365 tips and tricks blog, as it’s useful for just about any Excel project no matter what department.
10. Use the Status Bar
The Status Bar appears at the bottom of your Excel spreadsheet when you highlight a range of numbers. You can see information about the sum, average, and total number count. Many of us know the Status Bar is there, but not how useful it is. For example, you can actually add even more features to the Status Bar as you work on the document. Do you want to see the minimum and maximum values in the range you’ve highlighted? Just add it to the Status Bar! To add more features to the Status Bar, just right click it. This can save precious time trying to find the information as needed when working on a document. It will be right in front of you.
11. Don’t forget you Can ask Excel for help!
Feeling a bit overwhelmed by Excel, or can’t remember a function or formula? Our next Office 365 tips and tricks pointer is to remember the in-built help system is at your team’s disposal. Users often forget this is right at their fingertips, and instead spending time scouring the internet for answers to their spreadsheet queries.
To get help within Excel, just click the Search bar and type in what you’re wanting to do, such as ‘insert graph.’ Options will then come up and you can select what one applies. You can also just type ‘Help’ into the search bar and a list of common search items will appear. Another useful feature is the new Take a Tour functionality. Simply open Excel, go to Home and, instead of selecting Blank Workbook, select Welcome to Excel. You’ll be able to navigate through helpful tutorials covering all the Excel basics and more.

Outlook tips and tricks
12. Convert a note in OneNote to items in your calendar
Next up in our line of Office 365 tips and tricks is that OneNote lists can be easily transformed into a series of tasks within your calendar, complete with deadlines and reminder notifications. You can also convert OneNote items into meetings in your calendar, so you never miss an important date. Use the drop-down menus in OneNote to schedule a meeting, add contacts directly to your contact list, set up meetings or appointments in Outlook, share or discuss the items with an entire group (or with select members), and even mark to-do items as critical.
13. Never miss a meeting again
Office 365 tips and tricks are not limited to the organisation of documents, with appointments, emails, and contacts all synced with Exchange Online. For small-to-medium businesses, the best Outlook tip to guarantee you’re getting the most out of this synchronisation is to send all recipients updates. This will ensure everyone sees the same view of the meeting and no lines are crossed, such as people skipping updates they think they’ve already viewed. If you’re not the event organiser, make sure that you get into the habit of accepting or declining every meeting invitation, not just deleting them, in case there are any changes.
14. Put an end to the dreaded reply all forever
From the moment email became the business communication mainstay, it has been plagued by the infuriating and time-consuming reply all. Unfortunately, no one has ever successfully trained office personnel to hit reply instead of reply all when they simply need to bump back a quick, ‘OK.’ Even worse is the dreaded overshare to the entire office! Luckily, Microsoft Office 365 gives you the power to ignore these messages once and for all.
Simply open the message thread you want to put a stop to and click on the Home button. Within the Delete Group option, choose the option to Ignore. This automatically puts all new emails in this thread in your Trash folder. You can undo this action if you need by going back to the More button and selecting Stop Ignoring. That way, if the offending message thread does turn to important news, you can jump back in the conversation.
15. The recurring meeting feature
Meeting rooms, schedules, and dates (maybe you forgot to consider the next long weekend!) are likely to change. Therefore, it’s best to set up recurring meetings in your Outlook calendar for no longer than the next quarter. This also prevents calendar’s getting overcrowded, which can cause confusion and take time to sort out. These are productivity inhibitors our Office 365 tips and tricks aim to reduce within your workplace.
If you need to change a recurring meeting, don’t edit the meeting itself. Instead, cancel it for that week and send out the new meeting date and time as a separate invitation. If you don’t do this, you may start seeing issues of people’s schedules getting out of sync. This happens because each change to a recurring meeting is stored in Meeting Notifications and sent to all attendees.
16. Quicker, better performance
While Outlook is running, all of your calendars will be synchronised across your devices. To improve performance, move any shared calendars that aren’t used much to the Other Calendars folder. Limiting the calendars in your My Calendars folder results in a streamlined experience and fast performance. This may be the simplest, yet most effective, Outlook tips yet!
17. Recall an email after pressing send
At some point, we’ve all hit Send only to realise the email was sent to the wrong person, was missing an attachment, or had errors. An absolute favourite of our Office 365 tips and tricks is the ability to get that email back before it’s seen by the recipient. To recall an erroneously sent email, open the Sent folder and the email you wish to recall. Select the Move option and click on the Actions button. Choose Recall This Message. To completely delete the message from the recipient’s inbox, choose Delete Unread Copies of This Message. If you only need to make a quick change and then resend, choose Delete Unread Copies and Replace With a New Message. Then click the OK button and all is right with the universe once again.

Microsoft teams tips and tricks
18. Use Teams and stop relying on emails
You can post and forward emails directly to Teams for your entire team to read. Just select the channel you’d like to post the email to, press the ellipsis icon, and choose Get Email Address. Copy and paste this address into the email you’d like everyone in that channel to view and it will populate to Teams. This is so quick compared to writing out individual staff email addresses and possibly missing someone (this can be especially awkward if they’re sitting across from you in the office!). From here, you can use Teams to have an open discussion about the email with everyone in the channel.
19. Bookmarking content
Do you ever find yourself endlessly scrolling in a chat as you try and locate a message from a month ago? Listen to this Teams tip and you’ll no longer have to waste your time and effort! The bookmark feature is an office-favourite Office 365 tips and tricks function that lets you flag or save important items from your chats. You can also use it to save items from posts. All you have to do is hover over an item with your mouse and select Flag. When you need to view a saved item, choose Saved under your profile icon. You’ll see a list of posts and chats you’ve saved items from. Simply select the one it was from and it will be there waiting.
20. Give your group chat a relevant, unique title
Do you have multiple group chats in your history that are hard to distinguish? You can simply name each chat to make it easy to find later. Plus, you’ll remember exactly what you were talking about! To name your chat, select the pencil beside the chat members’ names and write in the desired title, such as ‘EOFY Meeting Prep’. You and the team members can then search this chat within teams using this title. If the chat is used frequently, or you know you’ll need it in the near future, another great Teams tip is to pin the chat so that it appears at the top of your chat bar. Your conversations are now sorted into topics, with the most relevant ones to your current workload being the most accessible.
21. Use connectors to keep up to date
Connectors let you keep updated on your frequently-used programs that are separate from the Office 365 suite. Some popular connectors used in businesses are Twitter, Facebook, Bing News, and Trello, but there are so many more, too! Using connectors will stream information into your selected channels and populate it in your conversation tab. The result? A dynamic feed and an in-sync team.
To add a connector, when you’re in Microsoft Teams select the More Options, Connectors, and Choose Connectors. The available connectors will appear as a list. Simply add the ones you’d like to use in your channel. This is an integrative, user-friendly part of our Office 365 tips and tricks that you don’t want your workplace channels to miss out on.
22. Let Teams transcribe for you
Our most time saving, yet underused, Teams tip is here! Teams can not only record team meetings, but transcribe them for you, too (halleluiah!). The best part is, now that you know this, you can go back and transcribe past recordings. To do this, open the recording and go to the Edit option. Under Video Language select English, click Auto-generate a Caption File, and then Apply. Next time you open a video, you’ll see a transcript of the meeting has been created for you. This is just another example of how Teams can empower your business.

SharePoint tips
23. Create multiple libraries
Remember, there is no extra charge for additional document libraries on SharePoint. You might just be trying to avoid an overcrowded document library, but there are also other significant reasons to consider. Let’s take, site and company security, for example. You may want documents to be on SharePoint and not a completely separate site, but want this group of documents viewed by a certain department — such as HR. Creating another library for this team’s documents is a great, streamlined solution. This library will only be able to be viewed by those with unique permissions to it.
24. Don’t spend money on a template
In 2019, your goal is most likely centred around creating a modern, up-to-date site. Our next bit of advice from our Office 365 tips and tricks is for anyone with this vision. Most SharePoint templates are frozen in time to keep the original look and feel of SharePoint. We doubt this is the style you envisioned for your 2019 website. Even more importantly, templates don’t have taxonomy (Team Store metadata has to be created and mapped separately) or built-in security (since the template cannot replicate security and permissions, you’ll end up having to put them in manually). Buying a template can be a huge time waster and make for a less efficient SharePoint experience. Plus, it’s an unnecessary expense. Sharepoint makes it so easy to just create your own template, anyway!
25. Ditch the employee handbook… put it on SharePoint!
Converting your employee handbook (or style guides, manuals, or other large documents) to SharePoint files has numerous benefits. Not only will you save on printing costs, but employees will seamlessly be able to access information using any of their linked devices. Company policies change over time. Storing your handbook on SharePoint gives you the freedom to update and amend it quickly.
A SharePoint tip to remember is the most efficient, effective way to organise these large documents is to break them. You can then use metadata to easily load multiple documents into a single document library. Metadata can be used to categorise the files under easy-to-navigate chapters and sections, but users can keyword search for content in Sharepoint, too.
26. Don’t forget to use the countdown timer
This is the fun bit of our Office 365 tips and tricks! Get your team excited and in the know about important dates and company milestones (maybe it’s the start-ups third birthday, the Christmas party, or the launch of the new website) with the much-anticipated countdown timer web part. To add a countdown timer web part to SharePoint, simply go to the page you’d like the timer added to, select Edit, choose the Plus sign, and select the Countdown Timer icon. You can then personalise the timer to suit your team by selecting whether you want the timer to count up or down, link to a page or file, and even add a background image. This is a SharePoint tip that any office can enjoy!
27. Add a Unique Identifier
Adding a Unique Identifier to a list or library on SharePoint can be really useful for many businesses, such as ecommerce stores. Unique identifiers can be handy when tracking purchase orders, if your business uses an online help desk ticketing system, or if you want to track flagged issues and items to action. The Unique Identifier is added automatically by SharePoint and, even if that item is deleted, the Unique Identifier it was issued with will not be reused.
In your Issues Log, you’ll see the Unique Identifiers displayed automatically under the Issue ID column. If you have a custom list, you’ll need to manually display this column. To do this, select Add Column on the right of your list. From the drop box, select Show/Hide Columns. Click the checkbox next to ID and hit Apply and Save. It’s that easy! If you’d like the ID column to appear to the left of your list, so it’s at the front, simply drag the column to the top before saving your changes.

OneDrive Tips
28. Add expiry links and passwords to sensitive files
If you want to share confidential information with a team member for a certain period, it’s really useful to add an expiry link to your file. Expiry links allow you to add a date and time to the link you’re sharing; the link will not work after this period. To do this, simply select Share, Link Settings, and Add Expiry Date. You can also add a password to your link when sharing sensitive information, so that you’re sure the only the person with your generated link and password can open the document. To add a password to your link, just go to Share and Set Password. Once you’ve chosen a password, you’ll be able to copy the link and send it to your colleague — just let them know the password you set for the file.
29. Download the OneDrive for Business sync app
Sometimes — even though the thought is terrifying — you may not be able to get internet coverage. Don’t worry, we have Office 365 tips and tricks for this very situation! Even though the main purpose of OneDrive for Business is being able to work from anywhere using the Cloud, it does offer a great measure in case you can’t connect — the Sync App. Once you’ve downloaded the app, sign into Office 365, go to OneDrive, select the library you want to be able to access offline, then hit Sync. If needed, you can always pause or stop the syncing process. OneDrive for Business lets each user sync up to 20,000 files and folders, so multiple projects can be accessed offline.
30. Quickly save attachments to OneDrive
If you get emailed attachments, you can easily download them directly to OneDrive instead of saving them to your computer’s Downloads folder and scrambling to find them later. This is a great trick to save time and know exactly where your files are. To save all the documents attached in an email, just select Save All to OneDrive. If you just want a certain number of the attachments, you can click them individually and choose Save to OneDrive that way. From here, you can move the files within OneDrive. Another great OneDrive tip is that now you’ll even be able to send these on as Cloud attachments.
31. Wrap your head around version control
Our next OneDrive tip centres around the importance of staying across the edits your colleagues have made to your shared files. Your job will be a lot easier if you don’t miss any important updates, amendments, and mark ups. To use version control, make sure Version History is enabled. Check this by selecting any file in your OneDrive library and click Files then Version History. If it’s greyed out, your site administrator might need to fix this for you, as only admins can enable or remove version control.
When version control is enabled, it doesn’t just let you see when edits have been made. It also allows you to view, restore, or delete a previous version of the document. If you are the site admin, you can choose between different version control options depending on the sensitivity of the document. For example, you can opt for a new version to be made every time an edit is made by a collaborator. You can also set a version cap so that, once a certain number of edited versions is reached, the oldest version of the document is deleted. This equals less clutter and a more efficient team. Plus, there’s less chance of an old version sneaking back where it doesn’t belong.
32. Embed a document to your web page
It’s time to unveil a lesser-known — but super handy — point from our Office 365 tips and tricks for OneDrive for Business. You can embed documents directly to your website or blog in just a few clicks. Whether it’s a presentation, document, or spreadsheet you want your readers to be able to click and view, it’s easy to share it with them on your site. Embedding your file also makes for a dynamic, professional layout. To embed a document, just click the box next to the name of the document, right-click, and press Embed then Generate. You will get an HTML code that you’ll be able to copy and paste to your website. Voilà!
Untap the potential of your business, your teams within it, and each individual employee, by fully utilising the Office 365 tips and tricks you’re learnt so far. Teams tips, SharePoint tips, OneDrive tips, and Office tips can help you get that much more out of your Office 365 subscription.
Microsoft claims that ‘on average, a small business can reduce the time spent on decision making by 17% by storing and managing critical organisational documents in a reliable, central location in the cloud. This is a testament to the incredible functionality of Office 365 within workplaces in 2019.

For a strong, savvy technology partner in all things in the business cloud, contact us at Stanfield IT today.
Considering Microsoft 365 for your business?
Speak to the experienced team at Stanfield IT on 1300 910 333