


The fastest way to secure Google Workspace is to enforce strong identity controls, lock down external sharing, deploy DLP in audit mode, activate Security Center alerts, and enforce endpoint policies through a staged rollout. Under Google’s shared responsibility model, Google secures the infrastructure — you are responsible for configuration, access management, and sharing policies. That distinction is where most breaches originate.
Here is your timeboxed plan:
72 hours
- Audit super admin accounts — remove any that are not actively needed.
- Enforce 2-Step Verification (2SV) for all admin accounts in the Admin console.
- Review and tighten external sharing defaults in Drive.
- Run the Security Health page check in the Admin console and note any critical findings.
2 weeks
- Deploy hardware security keys or passkeys for all admin and privileged accounts.
- Create baseline DLP rules in audit-only mode for Drive and Gmail.
- Enable the alert centre and configure priority alerts (suspicious login, mass sharing, DLP incidents).
- Activate the Security Center investigation tool dashboard.
2 months
- Restrict Drive sharing to trusted domains where your business allows it.
- Implement context-aware access policies for unmanaged devices.
- Promote DLP rules from audit to enforcement after tuning false positives.
- Run a phishing simulation and deliver targeted user training.
Key takeaways
Securing Google Workspace requires enforcing 2SV with security keys for admins, deploying DLP in audit mode before enforcement, activating Security Center alerts, locking external sharing defaults, and running a staged rollout with clear pilot criteria and user communications.
| Point | Details |
|---|---|
| Identity controls first | Enforce 2SV and deploy security keys for admins — this can cut account takeover risk by up to 50%. |
| DLP in audit mode before enforcement | Run DLP rules in inactive mode for at least five days to tune false positives before blocking actions. |
| Security Center requires Enterprise | Security Center and the investigation tool are available on Enterprise Standard and Enterprise Plus only. |
| Staged rollout reduces risk | Pilot with 5–15 users, define success criteria, and phase enforcement by OU before organisation-wide rollout. |
| Stanfieldit for managed support | Stanfieldit delivers Workspace security assessments, DLP tuning, and ongoing monitoring for Australian SMEs. |
Table of Contents
- What should you implement first in Google Workspace security?
- How do you enforce 2SV, security keys and admin account hygiene?
- How do DLP, external sharing controls and data classification work together?
- How do you use Security Center, the alert centre and the investigation tool?
- What are the minimum device management requirements for Workspace?
- How do you audit and control third-party app access to Workspace?
- Which Workspace editions include which security features?
- How do you run a staged Workspace security rollout?
- How Stanfieldit can help you secure your Workspace environment
- How do you back up and recover Google Workspace data?
- What user training works best for Google Workspace security risks?
- How do you use the Security Health page for ongoing posture assessment?
- The controls that matter most are the ones admins actually configure
- Stanfieldit helps Australian organisations get Workspace security right
- Sources
What should you implement first in Google Workspace security?
Not every control carries equal weight. The table below maps the highest-impact controls to effort, licence requirements, and monitoring needs so you can sequence your work.
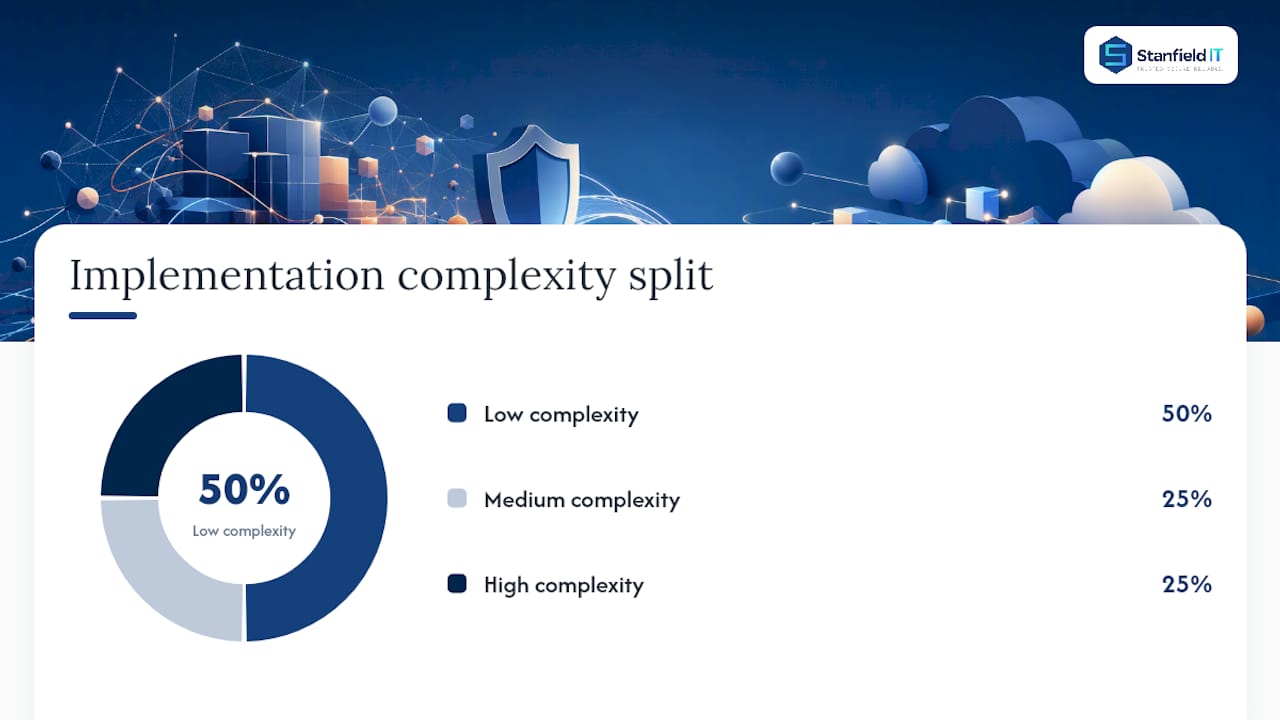
| Control | What it protects | Required edition | Implementation complexity | User impact | Monitoring effort |
|---|---|---|---|---|---|
| Enforce 2SV + security keys | Admin and user accounts | All editions (keys preferred on Enterprise) | Low | Low for admins, medium for users | Low (periodic audit) |
| SPF, DKIM, DMARC | Email domain spoofing | All editions | Low | None | Low |
| External sharing defaults | Drive and Docs data | All editions | Low | Medium | Low |
| Security Health page | Overall posture | All editions | Low | None | Low |
| DLP for Drive and Gmail | Sensitive data exfiltration | Business Plus / Enterprise | Medium | Low (audit mode) | Medium |
| Security Center + investigation tool | Threat detection and response | Enterprise Standard / Plus | Medium | None | Medium |
| Advanced endpoint management | Device compliance | Business Plus / Enterprise | High | Medium | High |
| Context-aware access | Unmanaged device risk | Enterprise | High | Medium | High |
Identity controls and email hardening sit at the top because they are low effort and protect against the most common attack vectors. Enforcing 2SV can reduce account takeover risk by up to 50%, and SPF/DKIM/DMARC together close the door on domain spoofing with nothing more than DNS record changes. These two areas cost almost no licence spend and deliver immediate risk reduction.
Google’s security checklist for medium and large organisations reinforces this layered approach: small teams should nail baseline protections first, while larger organisations need managed, layered strategies on top.
How do you enforce 2SV, security keys and admin account hygiene?
Identity is the perimeter in a cloud environment. Get this right before anything else.
Enforcing 2SV in the Admin console
- Go to Admin console > Security > Authentication > 2-step verification.
- Select the organisational unit (OU) you want to enforce — start with your admin OU.
- Set enforcement to On or On from date (the date option gives users a grace period).
- Choose the allowed methods. For admins, select Only security key to block SMS codes.
- Save and verify the setting has propagated (allow up to 24 hours for large orgs).
To check user 2SV status, go to Admin console > Reports > User reports > Security. The report shows enrolled methods, security key counts, and any accounts still using backup codes only.
Text-message codes are discouraged for high-value accounts because they are vulnerable to SIM-swapping and interception. Security keys and passkeys provide phishing-resistant authentication that SMS cannot match. The Admin console’s ‘Only security key’ enforcement mode requires admins to manage backup-code provisioning manually, because users in this mode cannot generate their own backup codes. Plan for this before you enforce broadly.
Admin role hygiene and least privilege
- Keep super admin accounts to an absolute minimum — ideally two or three named individuals.
- Create delegated admin roles for specific functions (Help Desk, Device Manager, Reporting) rather than granting super admin access for routine tasks.
- Maintain at least one dedicated break-glass super admin account, stored offline with credentials in a physical safe or a secrets manager. Never use this account for day-to-day work.
- Enable alerting for any privilege changes: Admin console > Reporting > Audit > Admin.
- Review admin role assignments quarterly and remove stale access immediately when staff change roles.
Super admin accounts are the primary target in a Workspace compromise. Reducing their count limits the blast radius if one is taken.
Pro Tip: When rolling out security keys, stage the deployment by OU. Start with IT staff, then executives, then the broader organisation. Test the reporting dashboard before each phase — security key enrolment data can lag by up to 48 hours, so do not assume immediate visibility after a user registers a key.
How do DLP, external sharing controls and data classification work together?
DLP for Drive and Gmail scans file content and email bodies using predefined detectors (credit card numbers, Tax File Numbers, Medicare numbers) and custom detectors you define. Rules can target specific OUs or groups, and they support multiple actions: audit only, warn the user, block sharing, or quarantine the message.
Three starter rule templates
Financial PII (credit cards and Tax File Numbers)
- Detector: predefined Australian Tax File Number + credit card number detectors.
- Scope: all Drive files owned by users in your Finance OU.
- Action (initial): audit only. Promote to “warn user” after two weeks of tuning.
- Recommended final action: block external sharing and notify the admin.
Health and medical data
- Detector: predefined Australian Medicare number detector + custom keyword list (e.g. “patient”, “diagnosis”, “referral”).
- Scope: all Drive files and outbound Gmail.
- Action (initial): audit only for one week, then block external sharing and quarantine outbound email.
- This template is particularly relevant for Australian healthcare organisations subject to the Privacy Act 1988 and the Australian Privacy Principles.
Internal project names and confidential labels
- Detector: custom regex or keyword list matching your project code naming convention.
- Scope: outbound Gmail and Drive files shared externally.
- Action: warn user on first match; escalate to block after repeated triggers.
Google’s DLP rule authoring guide covers custom detector syntax and proximity matching in detail — use it when building the custom keyword and regex detectors above.
Running rules in audit mode
Start every new DLP rule in inactive (audit-only) mode. Run it for at least five business days, then query the investigation tool (Security > Investigation tool) to review triggered events. Look for false positives — legitimate file shares flagged incorrectly — and adjust detector sensitivity or scope before switching to enforcement. Skipping this step is the most common reason DLP projects create user friction without improving security.
External sharing controls
- Admin console > Apps > Google Workspace > Drive and Docs > Sharing settings.
- Set the default to Off or Restricted to [your domain] for sensitive OUs.
- Enable Sharing outside of [domain] requires approval for general staff.
- Add trusted domains (partner firms, key clients) to the allowlist so approved collaboration continues without friction.
- Enable Warning when sharing outside domain for all users as a minimum baseline.
Pro Tip: Combine DLP blocking rules with context-aware access to block file downloads on unmanaged devices. A user can still view a document in the browser on their personal laptop, but they cannot download or print it. This is a practical middle ground for BYOD environments.
How do you use Security Center, the alert centre and the investigation tool?
Security Center shifts your posture from reactive to proactive by centralising threat signals, surfacing anomalies, and enabling organisation-wide remediation without needing to touch individual accounts one at a time.
Priority alerts to enable first
- Suspicious login activity (new country, impossible travel, unusual device).
- Mass external file sharing (a single user sharing dozens of files externally in a short window).
- DLP policy violations (once your rules are in enforcement mode).
- Malware detected in Drive or Gmail attachments.
Route these alerts to a shared security inbox or your ticketing system. In a small-to-medium Australian organisation, the IT admin and a nominated backup should both receive critical alerts.
Investigation playbook for a suspected account compromise
- Triage: In the investigation tool, search for the user’s login events over the past 7 days. Look for logins from unfamiliar IP addresses or countries.
- Contain: Suspend the account immediately (Admin console > Users > [user] > Suspend user). This blocks access without deleting data.
- Preserve evidence: Export the relevant audit log entries before taking any further action. Logs are available under Admin console > Reporting > Audit.
- Remediate: Use the investigation tool’s bulk actions to delete any malicious messages the account sent, revoke active sessions, and reset credentials.
- Communicate: Notify affected users and, where required under the Notifiable Data Breaches scheme, prepare a preliminary assessment for the Office of the Australian Information Commissioner.
- Post-incident review: Document what the attacker accessed, how they gained entry, and which control failed. Update your runbook accordingly.
Pro Tip: Test any automated remediation rules (activity rules that auto-suspend or auto-delete) in a staging OU before applying them organisation-wide. A false positive that suspends a legitimate executive account during business hours creates more disruption than the threat it was meant to stop.
- Enable Security Center’s audit log integration with your SIEM if you use one. The enterprise threat detection integration guide covers how to connect Workspace alerts to external ticketing and SIEM platforms.
- Review the Security Center dashboard weekly at minimum; daily during any active incident.
What are the minimum device management requirements for Workspace?
Endpoint management closes the gap between a secured Workspace account and an unsecured device accessing it.
Enrolment options
- Basic mobile management (all editions): enforces screen lock and allows remote wipe. Requires no agent install on Android or iOS.
- Advanced mobile management (Business Plus and above): adds app management, compliance policies, and conditional access.
- Endpoint verification (all editions, Chrome extension): collects device posture signals (OS version, encryption status) for use in context-aware access policies.
- Chrome/ChromeOS management: full policy control for managed Chromebooks, including forced extensions and browsing policies.
Minimum policy checklist
- Enforce screen lock with a PIN or biometric on all enrolled mobile devices.
- Require device encryption (enforced automatically on modern Android and iOS with advanced management).
- Set a maximum OS version age — flag devices more than two major versions behind.
- Enable remote wipe capability and test it on a spare device before relying on it in an incident.
- Block access from devices that fail compliance checks using context-aware access rules.
BYOD considerations
On unmanaged personal devices, you cannot enforce full device policies without a mobile device management (MDM) agent. The practical approach is to combine DLP context-aware access rules (block downloads, block printing) with a clear acceptable use policy that staff sign. Containerisation solutions that separate work data from personal data on the same device are available but add complexity and user friction — weigh this against your organisation’s risk appetite.
Pro Tip: Create separate policy sets for executives and any staff who handle sensitive data (finance, HR, clinical staff in healthcare). Apply stricter context-aware access rules and mandatory advanced management enrolment for these groups, while keeping lighter policies for general staff to reduce help desk load.
How do you audit and control third-party app access to Workspace?
Every OAuth app a user connects to Workspace receives a token that can read or write data on their behalf. Unreviewed app access is a common and underappreciated data exfiltration vector.
Audit flow
- Go to Admin console > Security > API controls > App access control.
- Review the list of connected apps. Filter by access level: apps with broad scopes (e.g., full Drive access, full Gmail read/write) are highest risk.
- Check the OAuth audit log (Admin console > Reporting > Audit > OAuth token) for recent authorisations, particularly from apps you do not recognise.
- Identify any apps with access to sensitive OUs or service accounts.
Creating an allowlist
- Set the default access policy to Restricted (only trusted apps can access Workspace data).
- Add approved apps to the allowlist by their OAuth client ID.
- Block any app that requests broad scopes without a clear business justification.
- Revoke access for any app that is no longer in active use: Admin console > Security > API controls > Manage third-party app access > [app] > Revoke access.
Initial app governance checklist
- Flag all apps with Drive full-access or Gmail full-access scopes.
- Review service account OAuth grants separately — these are often missed.
- Check internally developed apps for overly broad scopes and update them to least-privilege scopes.
- Document your approved app list and review it every six months.
For background on credential and secrets management for service accounts, the cloud secrets management guide covers credential storage practices relevant to Workspace service account governance.
Which Workspace editions include which security features?
Knowing your licence tier before you plan a rollout avoids the frustration of configuring a feature that is not available in your edition.
| Feature | Minimum edition | Notes |
|---|---|---|
| Basic 2SV enforcement | All editions | Security key enforcement requires admin configuration |
| DLP for Drive | Business Plus, Enterprise Starter+ | Not available on Business Starter or Standard |
| DLP for Gmail | Enterprise Starter+ | Requires Enterprise licence |
| Security Center | Enterprise Standard, Enterprise Plus | Not available on Business tiers |
| Investigation tool | Enterprise Standard, Enterprise Plus | Bundled with Security Center |
| Advanced endpoint management | Business Plus, Enterprise | Basic management available on all editions |
| Alert centre (advanced integrations) | Enterprise | Basic alerts available on Business tiers |
| Context-aware access | Enterprise | Requires BeyondCorp Enterprise add-on on some tiers |
Rollout timeline by organisation size
- Small (1–50 users): Allow 5–10 working days for planning and pilot, 5 working days for full rollout. Focus on 2SV, SPF/DKIM/DMARC, and sharing defaults.
- Medium (50–500 users): Allow 10–15 working days for planning and pilot group testing, 10–20 working days for phased enforcement. Add DLP and endpoint management.
- Large (500+ users): Allow 4–8 weeks for planning, a 2–4 week pilot, and a 6–12 week phased rollout. Requires dedicated project management and change management communications.
Pro Tip: Confirm SKU availability with your Australian Google Workspace reseller before finalising your licence plan. Enterprise add-ons (BeyondCorp, Security Center) have procurement lead times and may require a contract amendment. Budget separately for hardware security keys (Titan Security Keys or FIDO2-compatible alternatives) and factor in user training time as a project cost.
How do you run a staged Workspace security rollout?
A staged rollout reduces risk and gives you a controlled environment to catch configuration errors before they affect the whole organisation.
Staged rollout checklist
- Preparatory audit: Export current 2SV status, sharing settings, connected apps, and device enrolment status. This is your baseline.
- Pilot group selection: Choose 5–15 users across IT, management, and a representative business unit. Include at least one executive and one help desk staff member.
- Pilot success criteria: Define what “success” looks like before you start. For 2SV: zero lockouts after 48 hours, all pilot users enrolled. For DLP: false positive rate below 5% of triggered events.
- Phased enforcement plan: Week 1: enforce on IT and admins. Week 2–3: enforce on executives and sensitive-data groups. Week 4+: enforce on all remaining users.
- Final enforcement date: Set a hard date and communicate it at least two weeks in advance.
User communication template bullets
- 2SV and security keys: “From [date], all accounts will require two-step verification to log in. You will receive a prompt to set this up. If you need a hardware security key, contact [IT contact]. Help is available at [link].”
- Sharing changes: “Drive sharing settings are changing on [date]. Files set to ‘Anyone with the link’ will be restricted to [domain] users only. If you need to share with an external partner, use the approved method [describe method].”
- Escalation path: “If you are locked out of your account, call [help desk number] immediately. Do not attempt to reset your own password until you speak with IT.”
Incident playbook summary
- Contain first: Suspend the account, revoke sessions, and block the device before investigating.
- Preserve logs: Export audit logs before making changes that could overwrite evidence.
- Communicate: Notify your manager and legal/compliance team within one hour of confirming a breach. Under the Notifiable Data Breaches scheme, a preliminary assessment is required within 30 days of becoming aware of an eligible data breach.
- Post-incident review: Hold a review within five business days. Update policies, retrain affected users, and close the control gap that allowed the incident.
How Stanfieldit can help you secure your Workspace environment
Securing Google Workspace well requires more than ticking boxes in the Admin console. The controls that matter most — DLP rule tuning, Security Center operations, context-aware access, and ongoing incident response — demand consistent attention that most internal IT teams in Australian SMEs cannot sustain alongside their day-to-day workload.

Stanfieldit works with Australian professional services and healthcare organisations to assess, harden, and monitor their Workspace environments. The engagement typically covers a baseline security assessment, staged hardening against the controls in this guide, DLP rule authoring and tuning, Security Center alert configuration, endpoint management, and user awareness training. For organisations without a dedicated security function, Stanfieldit provides ongoing monitoring and incident response as part of a managed IT security services agreement.
For Australian SMEs starting from scratch, a recommended starter engagement covers the 72-hour and 2-week actions in this guide, delivered as a fixed-scope project with clear deliverables and a handover runbook your team can own. Talk to Stanfieldit about a Workspace security assessment.
How do you back up and recover Google Workspace data?
Google’s infrastructure is highly resilient, but it does not protect against accidental deletion, ransomware acting through a compromised account, or data loss from misconfigured retention policies. The Google Workspace security whitepaper documents Google’s own redundancy and encryption controls, but these cover infrastructure failure, not user-initiated or attacker-initiated deletion.
For Australian organisations, a practical backup strategy combines three layers:
- Google Vault: Available on Business Plus and Enterprise editions, Vault provides retention policies, legal holds, and eDiscovery for Gmail, Drive, Chat, and Meet. It is not a traditional backup tool — it retains data according to policy, but it does not allow point-in-time restore of a specific file version outside of Google Drive’s native version history.
- Drive version history and Trash recovery: Drive retains deleted files in Trash for 30 days and keeps version history for edited files. Admins can restore deleted files for up to 25 days after a user empties Trash via the Admin console.
- Third-party backup: For organisations that need point-in-time restore, longer retention than Vault provides, or protection against account deletion, a third-party backup solution that connects via the Google Workspace APIs provides an independent copy of data outside Google’s infrastructure.
Review your retention policies in Vault annually and test your recovery process at least once per year. A backup you have never tested is not a backup you can rely on.
What user training works best for Google Workspace security risks?
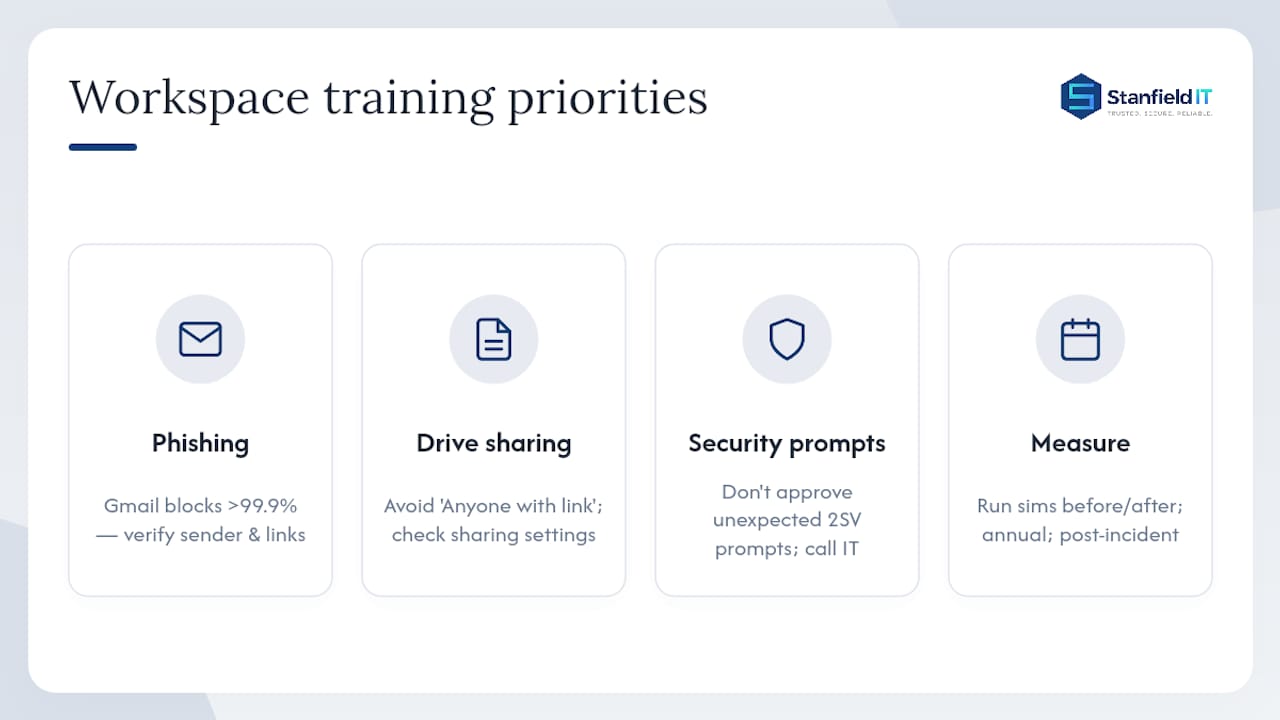
Technical controls reduce risk, but users remain the most targeted entry point. Phishing, credential theft, and accidental oversharing are all behaviours that training can measurably reduce.
Effective training for Workspace environments focuses on three areas:
Recognising phishing in Gmail. Gmail’s automated defences scan over 300 billion attachments weekly and block more than 99.9% of spam, phishing, and malware. The messages that get through are the sophisticated ones — targeted spear-phishing that mimics internal senders or trusted services. Train users to verify sender addresses, check links before clicking, and report suspicious messages using the “Report phishing” button in Gmail rather than deleting them.
Safe sharing practices in Drive. Most accidental data exposure in Workspace comes from users setting files to “Anyone with the link” without realising the implications. A short, practical session showing users how to check sharing settings and use the correct sharing method for external collaboration reduces this risk significantly.
Responding to security prompts. Users who understand why they are being asked to verify their identity or why a DLP warning appeared are far more likely to comply correctly than users who see these prompts as obstacles. Brief your users on what 2SV prompts look like, what to do if they receive an unexpected one (do not approve it — call IT), and how to report a suspected account compromise.
Run a phishing simulation before and after training to measure improvement. Several Australian-aware platforms support Google Workspace integration for simulation campaigns. Schedule training annually at minimum, and trigger additional sessions after any security incident.
How do you use the Security Health page for ongoing posture assessment?
The Security Health page (Admin console > Security > Security Health) is the fastest way to get a structured view of your current configuration against Google’s recommended baseline. It checks settings across authentication, data access, email, and mobile management, and flags any that fall below the recommended threshold.
Use it as a recurring operational tool, not a one-time setup check. A practical cadence for Australian organisations:
- Weekly: Review any new critical or high-severity findings. These typically indicate a setting has drifted from its enforced state, often because an admin changed something without realising the security impact.
- Monthly: Export the full findings report and compare it to the previous month. Track whether your posture is improving, stable, or degrading.
- Quarterly: Use the findings as the agenda for a brief security review meeting with your IT lead or managed provider. Assign remediation owners and due dates for any open findings.
The Security Health page does not replace Security Center for threat detection, but it is available on all Workspace editions, making it the primary posture tool for organisations on Business Starter or Standard tiers that do not have access to Security Center. For those on Enterprise tiers, use both: Security Health for configuration drift and Security Center for active threat monitoring.
The controls that matter most are the ones admins actually configure
Most Workspace security failures are not Google’s fault. The platform provides detection, encryption, DLP, and endpoint management. What it cannot do is configure itself. The shared responsibility model is clear on this: Google secures the infrastructure; you secure the configuration.
The conventional advice on Workspace security tends to list every available control and call it a checklist. That approach is not wrong, but it misses the practical reality for most Australian IT teams: you have limited time, a mixed licence estate, and users who will push back on anything that adds friction. The controls that actually get implemented are the ones with a clear owner, a realistic timeline, and a tested rollout plan.
Two things are consistently underweighted in generic guides. First, DLP audit mode is not optional — it is the difference between a DLP project that works and one that floods your help desk with false-positive complaints on day one. Second, the Security Health page is underused. It is available on every Workspace edition, it checks your configuration against Google’s own baseline, and it takes about ten minutes to review. Admins who check it monthly catch configuration drift before it becomes an incident.
The priority order in this guide reflects real-world risk: identity first, email hardening second, sharing controls third, then DLP and endpoint management as your licence and capacity allow. Start there, run a proper pilot, and build from a stable foundation.
Stanfieldit helps Australian organisations get Workspace security right
Most Australian SMEs have the right Workspace licences but have not fully configured the controls that protect them. The gap between a default Workspace setup and a hardened one is almost entirely a configuration and process problem, not a technology problem.
Stanfieldit delivers practical cyber security services for Australian businesses that close that gap. For Workspace specifically, this means a structured security assessment against the controls in this guide, staged hardening with documented changes, DLP rule authoring and tuning, Security Center alert configuration, and user awareness training tailored to your team’s actual risk profile. Ongoing monitoring and incident response are available as part of a managed services agreement, so your environment stays secure as your organisation grows and Google’s platform evolves.
If you are an IT admin or business owner who wants a clear picture of where your Workspace environment stands today, start with a Workspace security assessment from Stanfieldit.
Sources
These are the primary references for implementing and justifying the controls in this guide:
- Protect your business with 2-Step Verification | Security & data protection | Google Workspace Help
- Shared responsibility for cloud security (Google Cloud documentation)
- Security center (Google Workspace)
- Google Workspace security whitepaper
- Deploy 2-Step Verification | Security & data protection | Google Workspace Help